Build 102: Hot Swap Keyboard

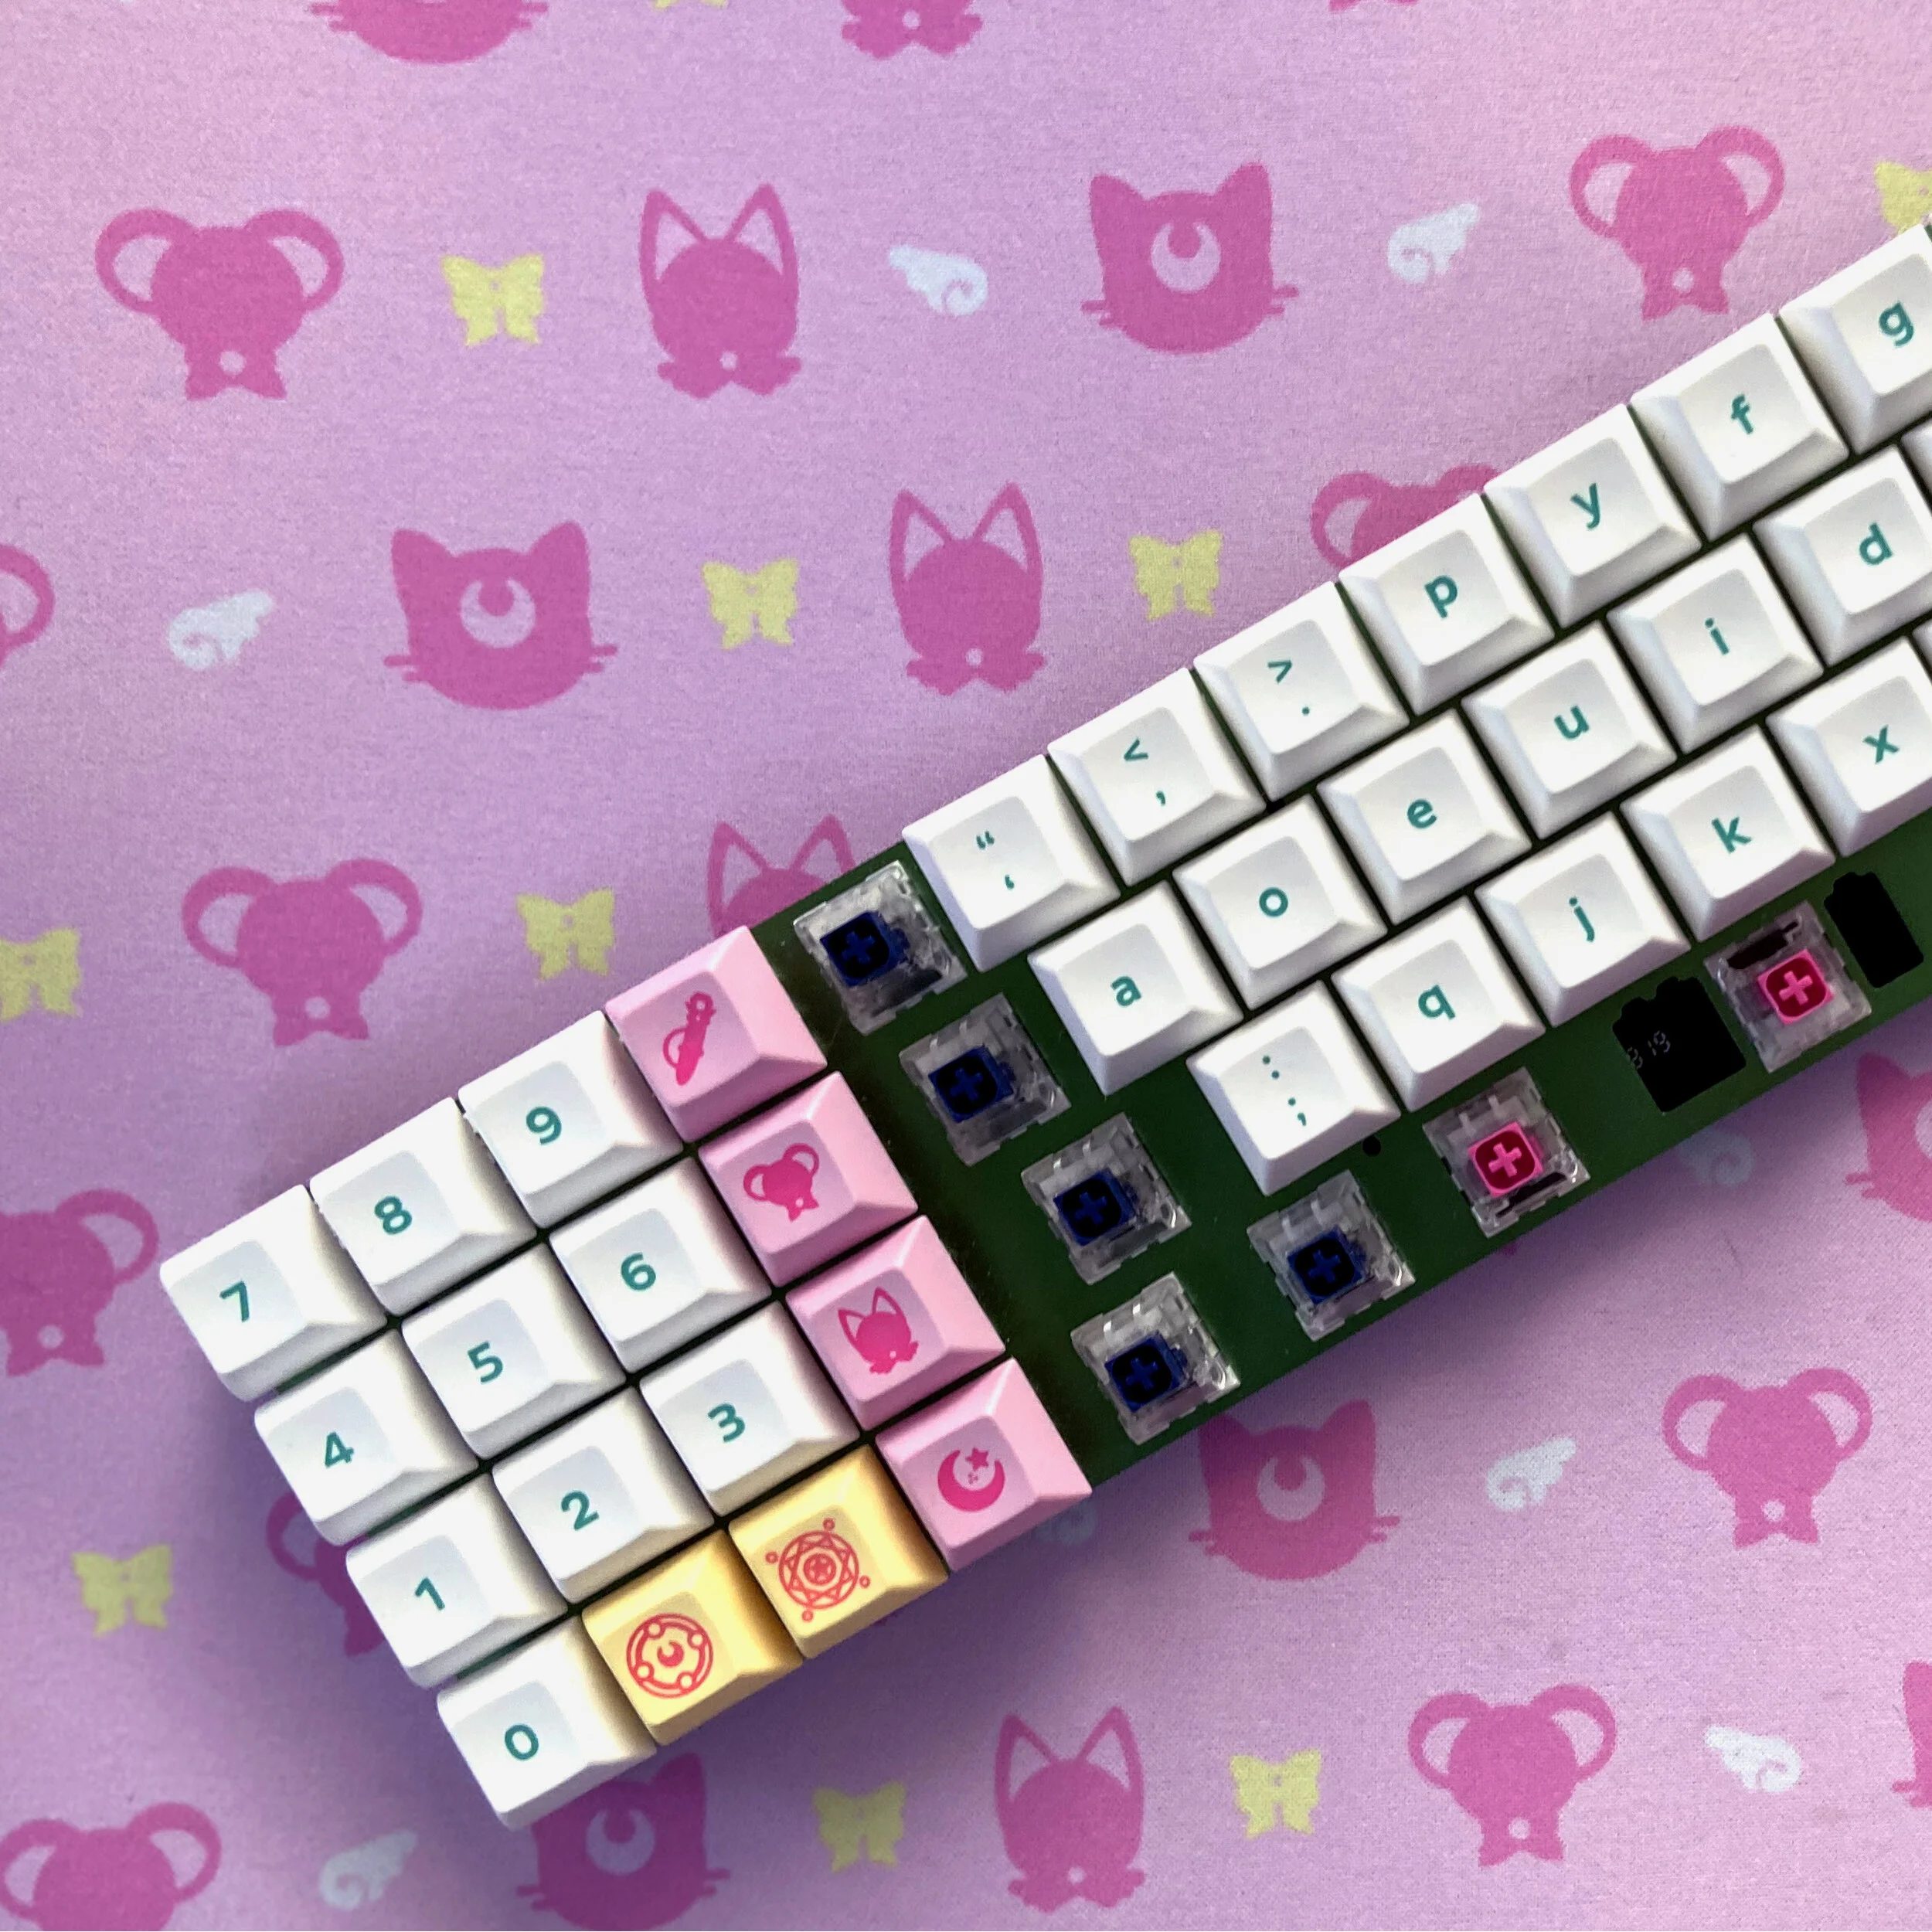
Mint CandyBar Keyboard with DSA Magic Girl Keysets.
We’ll be building a CandyBar Premium Keyboard.
A hot swap board means you can easily pop in and out any switch. No soldering required. Just be careful not to bend the little metal legs on your switches!
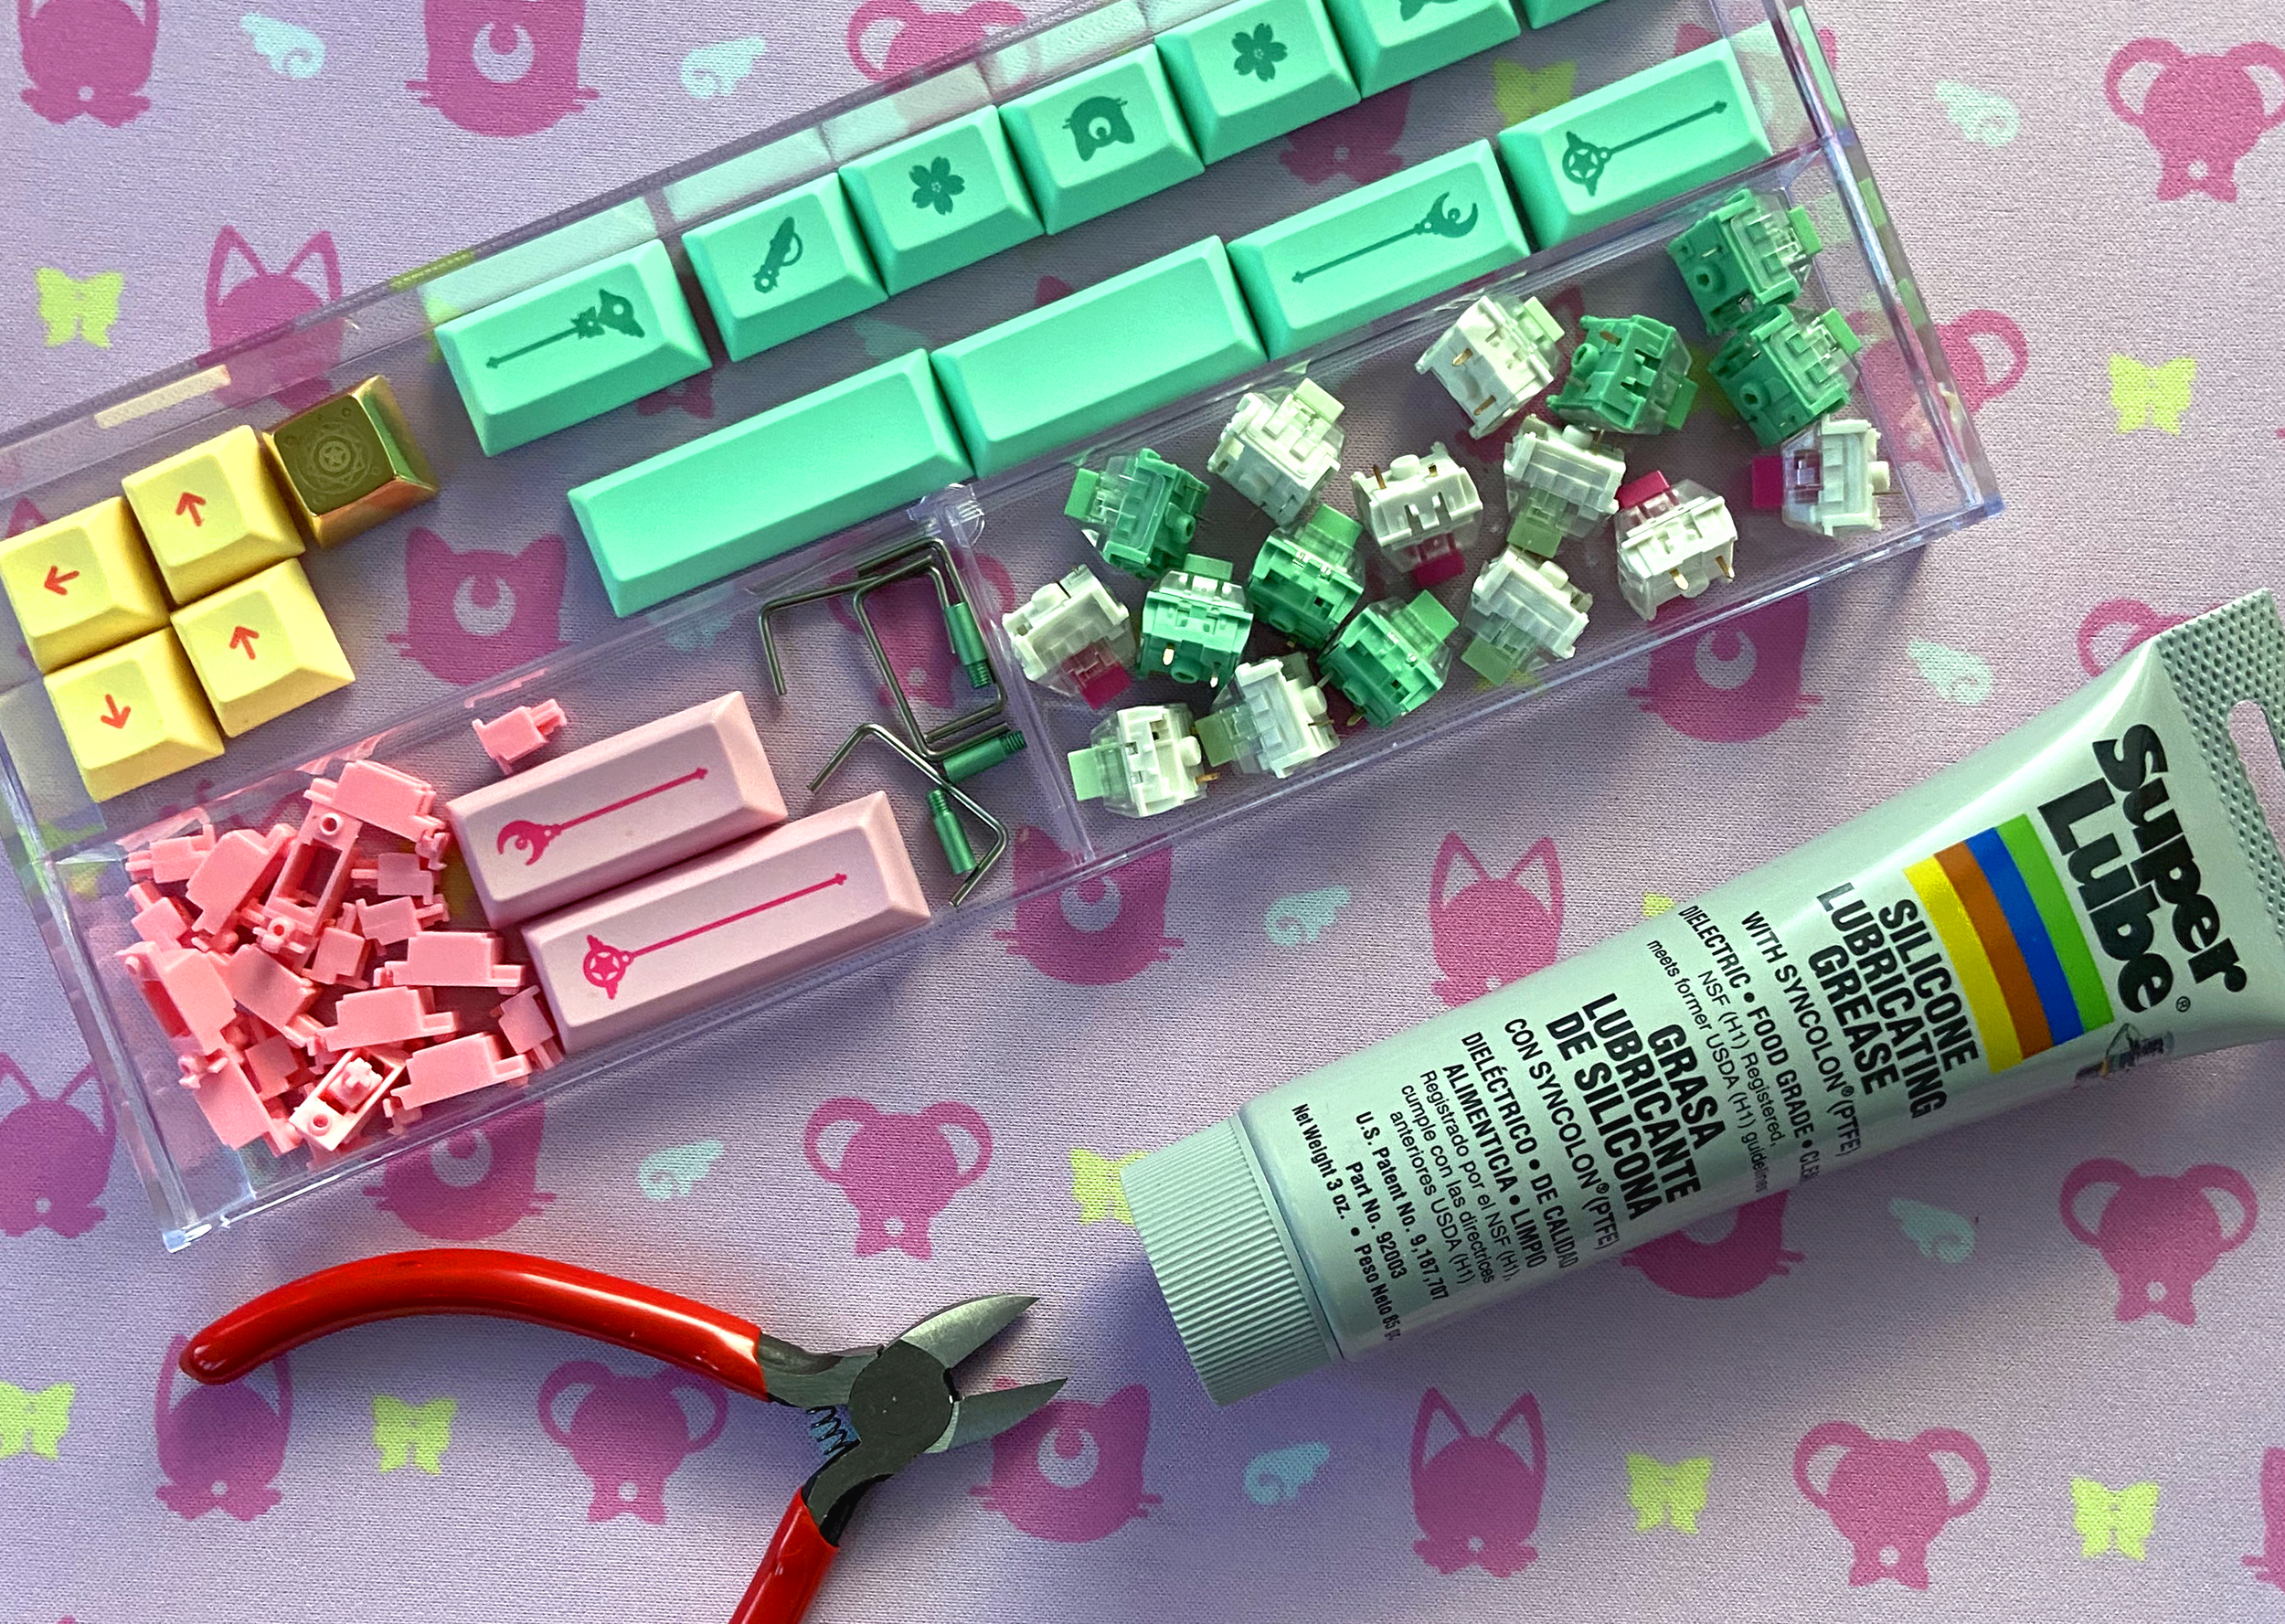
Ingredients
1 pack of Stabilizers
2 ml of Lubricant
62 Switches
1 keyset including:
Alphas Keys
40s Ortho Keys
NumPad Keys
1 Tweezers, Slanted
Preparation
Materials to assemble
your keyboard.
1.
Lay out all of your ingredients on your workspace. If you have trays, they are useful for keeping loose parts like screws from getting lost!
2.
Take a moment to decide the layout you’d like your keyboard to have. This will determine the number of stabilizers and switches you'll need for your build.
3.
Insert the stabilizers you need for any keys 2u or larger.
4.
Align your plate on top of the PCB. Hint: check how the numpad lines up in the plate and PCB to see if it's correct.
CandyBar is a hot swap board! All you gotta do is push in your switches into the holes in the plate. If you’re having trouble doing so by force, you can use your tweezers to squeeze the edges to get past the plate.
5.
Plug it in! It’s important to test that your keyboard works. If your order did not come with an included cable, you can get a cheap USB-C off Amazon for testing purposes. For nicer cables, check out any of the custom cable vendors. If you are feeling particularly ambitious, you can order a DIY Cable Kit. It’s fun to customize every detail of your mechanical keyboard.
6.
Test your switches via a key press program. Key press not registering? Make sure there aren't any bent legs.

7.
The CandyBar Keyboard is a tray-mounted board. Place your plate and PCB into the tray. Then screw it in, using the matching screws. The mounting points go through the plate & PCB assembly.
8.
It’s time to adorn your keyset, the funnest part! Be creative. The best part of hot swap is that you can easily redo the layout if it's not to your liking without having to desolder anything.
9.
Place nicely in natural light and take a glamour shot. Look out for our upcoming article: Glamour Shots 101. We love seeing your builds in the wild.
10.
Despite the name and the fact your accessories may look delicious: Please do not eat your keyboard. Thank you!

Troubleshooting FAQ
Switch not working?
Check if you bent a leg. Grab your slanted tweezers! Gently pull the switch leg straight.
Can’t screw in the plate to the board?
Oops, you'll need to unmount the keycaps to mount the plate. Look under the keycaps to get the screw in. Don’t worry, it’s very exciting and we understand if you skipped ahead to the best part.

The CandyBar Keyboard is back. New colors. Pre-orders are open until April 24th.
Pre-order period starts April 10th at 9pm ET and is open for 2 weeks.

Possible combination of CandyBar Round 2 Case & Plate colors. Mix and Match!
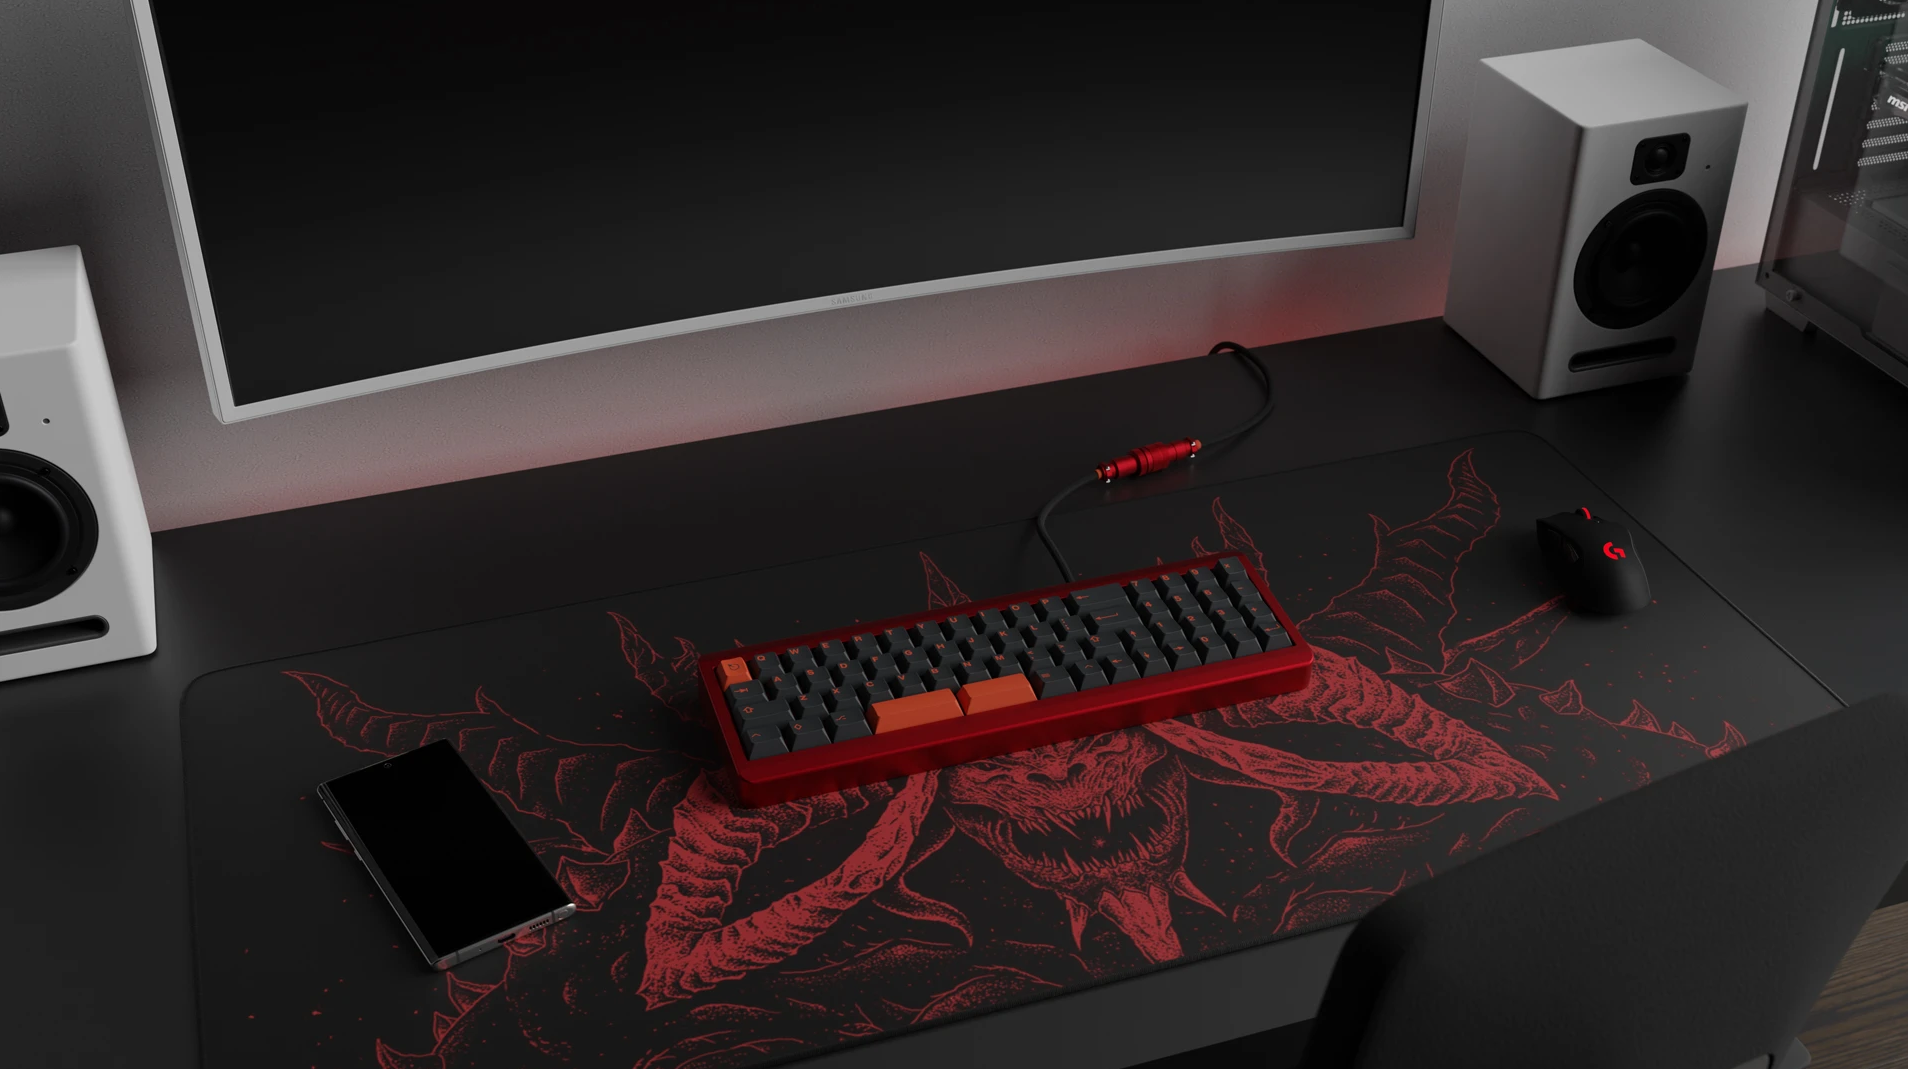
Cherry Bomb CandyBar Keyboard with Infinikey Sanctuary Rebirth PBT Keyset.